Feeds:
Posts
Comments

Posts Tagged ‘fabric’

Sorry, I was gone FOREVER, wasn’t I?

I’ve been very busy with Lots of things. Which I will show you in coming posts.

But first . . . an Announcement:

The Spoonflower shop is OPEN.

my spoonflower 1

my spoonflower 2

my spoonflower 3

my spoonflower 4

my spoonflower 5

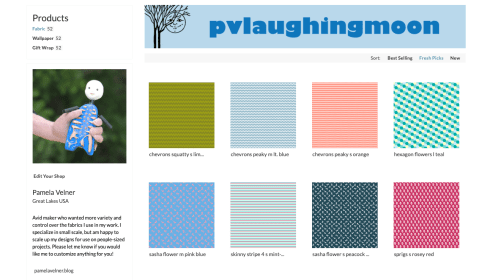
And just in time for their 50% off fat quarters sale. Which ends August 11th.

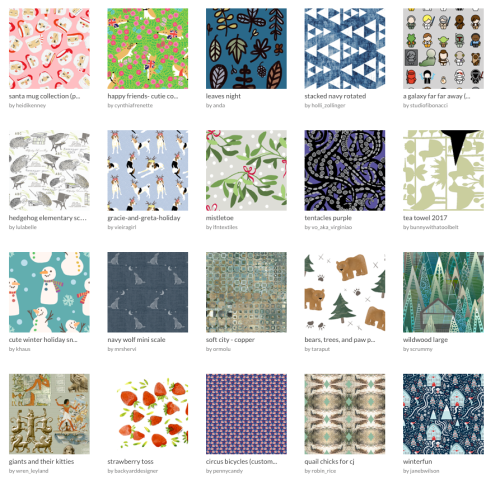
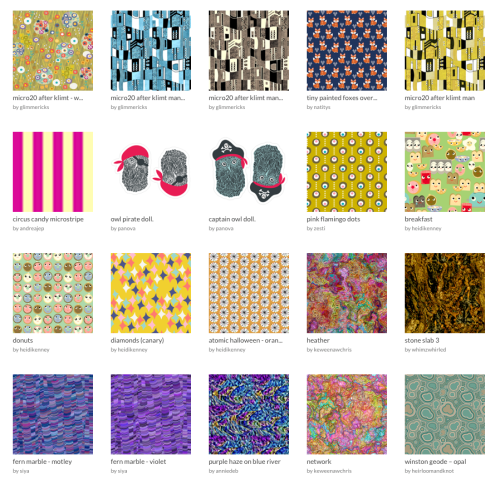
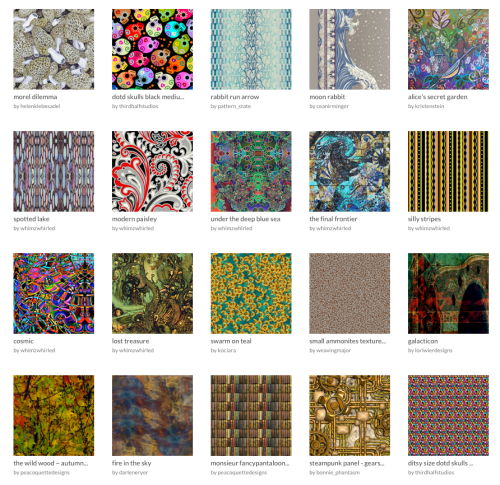
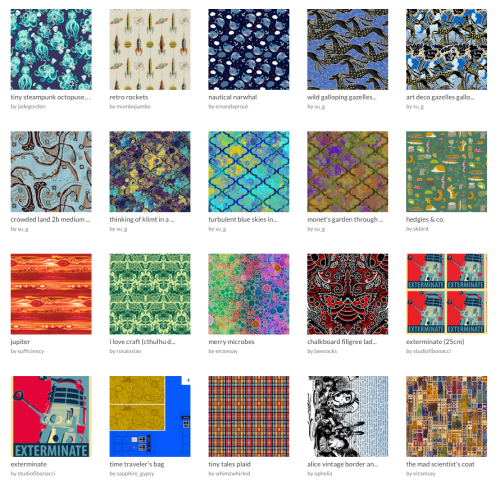
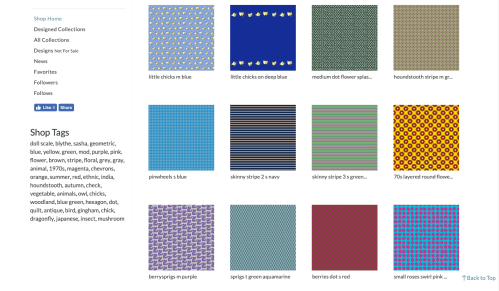
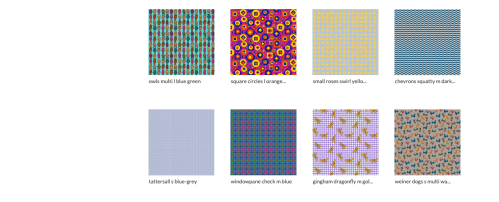
I’m concentrating on doll scale fabrics. All the designs are labeled as S (small 8″ to 10″ dolls) M (medium 12″ to 14″ dolls like Blythe) or L (large 16″ to 18″ like Sasha or American Girls). There are a very few labeled T (for tinies like RealPuki or Kiddles). So if you want some small scale fabrics and like what you see above — go shop!

I will be adding new designs and color schemes periodically. Enjoy!

Read Full Post »

Do you love fabric? Do you wish you could get custom printed fabric (or gift wrap or wallpaper)?

Well that is just what Spoonflower is/does.

And right now they are having a wonderful event. 2nd chance at 2 for 1 Fat Quarters of Fabric.  Now until noon EST December 16. Effectively it’s actually 50% off Fat Quarters because when you get to your cart even if you have odd numbers they are all at 50% of regular price.

Usually they do this sale once a year — in November. This year I finally branched out from basic cotton and jersey and got some silk (real silk not polyester) and cotton sateen. They are gorgeous.

They have some truly lovely designs for sale. Just make sure to look at large pieces in the preview as not all designs repeat as well as others. Make sure you like the repeat before ordering.

This are some the currently trending designs:

spoonflowers-whats-trending-12-14-16

And a few (OK more than a few) of the designs from my favorites:

spoonflower-a-few-favorites

(I ordered a fat quarter of micro20 after klimt in silk and it is amazing – more pastel than the preview but amazing.) And the captain owl doll in linen canvas (8″ swatch is 1 doll).

spoonflower-a-few-more-favorites

I ordered some dotd skulls black medium in linen canvas last year to make a new skull handbag. Still haven’t made it yet but I’ve got the fabric. Hah!

spoonflowers-the-favorites-continue

Yup, I bought the tiny steampunk octopuses and the exterminate 25cm fabrics this year.

I strongly advise creating an account so that you can make a favorites list; that way when there is a sales event so you’ve got them all in one easy to shop place. I didn’t do this the first year and figuring out what I wanted to order was both time-consuming and frustrating. Still worth it but boy did it eat up time.

Read Full Post »

Art Raven for Charity

Yes, I adopted this raven. No really, this is my contribution for a local art charity event “Art the Flock Up!”. All the embellished ravens will be on display in downtown Adrian both inside and outside of community buildings throughout the month of October. They will then be auctioned off on October 28 at a reception and poetry event celebrating the works of Edgar Allen Poe at 6:30 p.m. at the Adrian Public Library. The money raised will go to support the LCVA and Lenawee Reads.

I was in the library a few weeks ago and I saw this crazy bird dressed like John Belushi as a Bee sitting on top of one of the short bookcases in the lobby area. There was a sign that said “Adopt a Raven” and “In the Spirit of Poe”. Curiosity won, I asked a librarian “What’s the deal with the bird?”. A tenner later I was strolling out with my very own blank raven, OK, my very own blank crow decoy.

I decided to do mine up as, well, Raven. It just seemed like too good an opportunity to do some native american art to pass up. I modified some northwest coast clip art images and made stenciled fabric appliqués which I then glued in place. I used freezer paper stencils to apply white paint to orangey-red fabric. The stylized hands on the wings were fiddley to glue on but I’m pleased with the final effect.

This face mask/moon disk will no doubt get used again, I really like the way the stencil turned out. I had some fun with this and can’t wait to see what other people did with their birds. If you’re in the Adrian area please stop by the reception and join the fun!

Read Full Post »

Blythe Doll Birthday Outfit

Back in July I set out to make a special birthday surprise for my friend Arlene. I know that she likes Blythe so I searched on the web to see if I could find some clothes patterns. Jackpot! Turns out that Blythe people love to share both photos and patterns. So despite the fact that I don’t own a Blythe doll I was able to print out actual size patterns and make a fun outfit. I ran late finishing it up so Arlene got it a day or two after her birthday but she phoned and made it clear that she loved it (surprises are so great).

(Extremely Simplified) Background: Blythe was a very unusual doll made in 1971, some people loved her and a lot of people were pretty much freaked out by her really quite large head and that she had multiple sets of eyes which revolved in her head to change colors and direction of glance. So she went away for a long time until ebay. Then she came out of the attics, garages and other assorted places she’d been living and started going for massive prices at auction. People who love Blythe really, really love her. So eventually a couple of companies licensed the rights to manufacture new Blythe dolls. Which led to all the new Blythe fans and their websites, flickr groups and lots and lots of wardrobe fun.

Arlene's Blythe

Arlene kindly sent me a photo of her doll wearing the outfit (and additions). This is what I made: the black sparkly felt mouse hat, the multi-color print mod sleeveless dress, and the lime and blue shoulder bag. I’m told that Arlene’s Blythes are quite the fashionistas so she added the black daisy pin, the tights and those fantastic purple Frankenstein boots (serious shoe lust happening here). I used my favorite mod fabric from my stash hoping that it would look good on a redhead — success!

So I said that surprises are great, well they really are because this little beauty showed up in my mailbox a little while ago. Arlene decided to surprise me back; what a sweetie-pie. There was even a tiny itty greeting card in the box with a note. Completely itty; I had to use tweezers to open the flap.

Isn’t she just adorable? She’s the same size as the little green haired doll in the outfit photo. Which is about 4-1/4″ tall. The little clothes come on and off; she’s wearing a red vinyl sleeveless dress under the white coat. Her red boots are painted on. Her hat has a fabric flower. Incredibly cute and she came to live with me so that Arlene and I would both have one. I totally love having such imaginative, creative friends — they give me excuses to play. Oh Fun . . . Oh Joy!

Stay tuned . . . next week: mod inspiration.

Read Full Post »

Man in the Moon Quilt

This is a small wall quilt that I made for John the year the movie about Andy K. came out. I thought it would be timely to blog about it now as there’s still plenty of time to whip up a similar quilt for the holidays if you were so inclined. It’s pretty basic; just a piece of patchwork, a dimensional face/moon, and a scattering of glass beads. The finished piece is a case of the final result being way nicer than it’s component parts.

man in the moon art quilt

The trick that I used to make the patchwork background is pretty easy. Use a rotary cutter and quilting ruler to cut a bunch of squares then arrange them on light-weight fusable interfacing (fusible surface up, squares wrong side down). Here’s something you should do that I didn’t: draw at least two perpendicular guidelines on the interfacing to help keep your work square. They even sell fusible now with a grid pre-printed on it (which they didn’t when I made this). When you get the arrangement the way you want it; fuse the squares in place. Ta-da! One piece ready to quick zip up all the seams. I incorporated a dowel pocket into the lining/backing to keep the quilt from sagging and sewed on a metal ring for hanging.

man in the moon quilt detail

Then there’s the moon/face that I made from a picture of Andy. I printed it the size I wanted on photo paper and mounted it with heavy duty iron-on glue to a piece of mat board. Then I trimmed it out with an exacto knife and sealed it with a couple of light coats of clear Krylon spray paint. I used hot melt glue (hi-temp) to attach three flat round shank buttons to the back which serve double duty to both attach the face to the quilt and also hold it out a bit from the fabric surface for more dimension. I painted the hardened glue and the back of the buttons with Scribbles fabric paint to make it look nicer and blend with the dark background. Then I used several strands of heavy button thread to tie the face on (marking on the back where each of the three buttons would fall so I’d know where to stab through). Make your strands longer than you need for tieing, stab them all through and then pull them all tight and tie off; really it’s much easier than trying to do each button in turn.

All in all, these are a couple of very versatile tricks that could be used and adapted to make a wide variety of wall quilts and other fabric objects. The picture on board trick is best used for objects that only get light handling — try iron-on transfer to fabric mounted on thick felt for stuffies and other medium to heavy use projects.

Read Full Post »