These are about a foot tall and have a metal ring sewn to their backs so that they can hang on the wall. Their arms are jointed with little beads in a button-joint arrangement. I made them using a felt fused to fabric technique. Each doll has three layers: a surface/design fabric layer; a central stiffening sandwich layer of muslin fused on both sides of felt; and a backing layer of wool felt. The arms are made from two pieces of fused felt and design fabric which I hand sewed back to back. All design fabric layers are lined so that there are no raw edges. The dolls are embellished with both reverse and regular applique and a variety of beads.
Posts Tagged ‘fused felt’
Fabric Paper Dolls
Posted in accessory, tagged fused felt, paper doll on September 15, 2010| Leave a Comment »
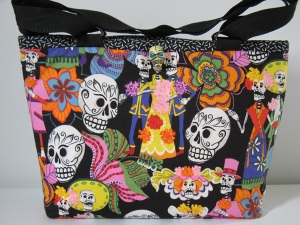
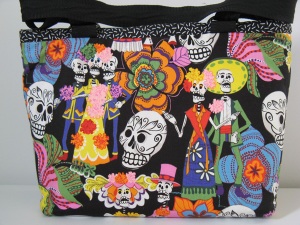
Day of the Dead Tote Bag
Posted in accessory, tagged fused felt, organization on July 28, 2010| 2 Comments »
Last August I realized several things. First, that NIADA at Arrowmont was fast approaching. Second, that I wasn’t going to want to be hiking back to my room for things I needed for my next activity. Third, that my current handbag was woefully inadequate for the task of holding what I was going to need for the whole day. Scratch that – I have Never owned a bag that really met my storing-my-stuff needs. So I decided to make my own.
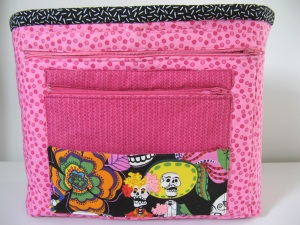
It had to be sturdy; inside as well as outside. It had to have pockets on both the front and back and they had to be designed to hold the stuff I carry. There had to be open space in the middle for notebooks, datebooks, keys, the other detritus of daily life. The handles had to be strong and be attached in a way to allow hands free carrying. I wanted it to be cheerful and fun. Here’s what I made.
The fabric is an Alexander Henry paired with a light pink polka dot and a darker pink stripe, the binding is a black and white dash print. All the fabrics are quilting weight. The strap is nylon webbing designed for backpacks and other sporting gear; it’s attached with d-rings and is one continuous strand which allows for cross-body-bag-on-hip carrying. I generally double the straps and carry it over my shoulder but I like the versatility factor.
There is a simple secret to how I made the fabric so sturdy: I fused white acrylic felt to the wrong side of the fabric. In effect the entire bag is interlined with felt; lining and pockets too. It takes a very long time to do this with a home iron but it’s totally worth it for the final result.
Inside I put two arrangements of pockets. On one side I put two zipper pockets: one large, one medium, and a horizontal pencil/pen pocket. The medium pocket is for my cell phone and now I can always find it and a pencil – neither can burrow to the bottom of the bag any longer.
The other side I arranged to hold other things I didn’t want floating around; stuff I’d want to find quickly or wanted in a more protected space. So there’s a bank of open pockets for meds, chapstick, magnifier, and a business card pocket. Then there is a roomy cargo pocket for my camera or glasses case or a medium bottle of water. The cargo pocket has a flap that can be velcroed shut or tucked inside the pocket as needed.
As a bit of fun I planned the layout of the print for the front so that I could use a rhinestone-eyed skull as a decoration. I disassembled an old keychain and drilled a hole to make the skull into a button. It looks rather silly peeking out of the inside of the tote in this photo.


